Release Notes > Older Releases > 5.37.0
Upgrade From 5.36.x to 5.37.0
Learn how to upgrade Webiny from 5.36.x to 5.37.0.
Before upgrading to 5.37.0, please ensure your Webiny project is using the new project
setup, introduced with Webiny
5.29.0. In case you did not already migrate, please visit the migration
guide.
- how to upgrade Webiny from 5.36.x to 5.37.0
Make sure to check out the 5.37.0 changelog to get familiar with the changes introduced in this release.
Step-by-Step Guide
The following steps will guide you through the upgrade process. Please note that this guide assumes you are using the new project setup, introduced with Webiny 5.29.0. In case you did not already migrate, please visit the migration guide.
1. Upgrade Webiny Packages
Upgrade all Webiny NPM packages by running the following command:
Note the 5.37.3 version in the command above. We strongly recommend users to immediately upgrade to the latest patch version, as with this release, we’ve addressed an important data migrations-related issue.
Once the upgrade has finished, running the yarn webiny --version command in your terminal should return 5.37.3.
2. Run the Upgrade Command
The next step is to run the project upgrade:
3. Deploy Your Project
Proceed by redeploying your Webiny project:
dev or staging.Additional Notes
Updating Your Custom API Plugins
As described in the changelog, there’s now a new lifecycle event, onTenantAfterInstall, which serves as a single, reliable place to hook into Webiny app installation for each tenant, and add things like initial data setup, etc. If you’re currently using events like pageBuilder.onSystemAfterInstall, or cms.onSystemAfterInstall, we highly recommend updating your code to use the new event tenancy.onTenantAfterInstall.
The reason this is important to do is that, with the 5.37.0 release, we changed the order of app installation, and moved the Headless CMS app to be one of the first ones to be installed, because now File Manager depends on the Headless CMS. This change should only take a few moments to do, but it will make your system much more reliable, and future-proof.
Simply look for the AfterInstall string in your custom plugins to find all references to the legacy events, and modify the code to look something like this:
Legacy Rich Text Editor Support After the Upgrade
After the upgrade to the new 5.37.0 version, we will still support the legacy editor.
Here is how it works.
- Legacy Rich Text editor will appear for the existing content.
- For the new models, you can choose between the Legacy (EditorJs) and Lexical Rich Text editors. We recommend Lexical Editor to write your next content.
- We use the feature flag allowCmsLegacyRichTextInput to support both editors.
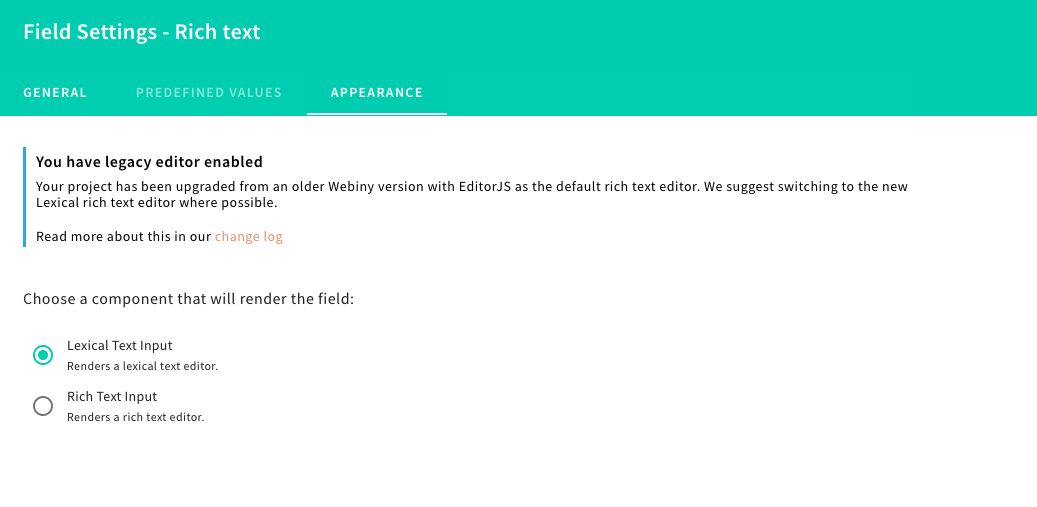
In the Rich Text field settings form, click the Appearance tab you will see this message:
 Support of the Legacy Rich Text editor after upgrade
That means the feature flag is set in the project to support the Legacy Rich Text editor as option for the new models. Remove the feature flag and Lexical editor will be default editor for the Rich Text field (recommended).
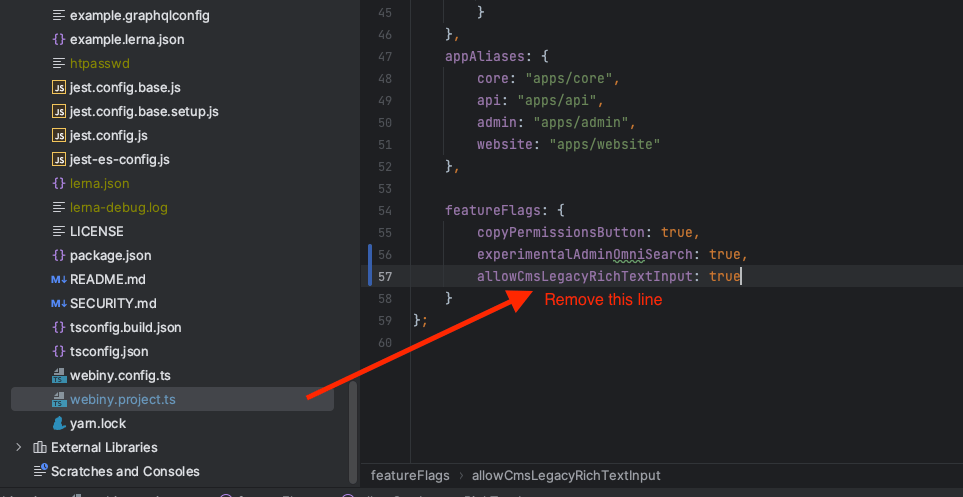
As shown in the screenshot, in the root of project open webiny.project.ts and remove the feature flag.
 Remove the feature flag
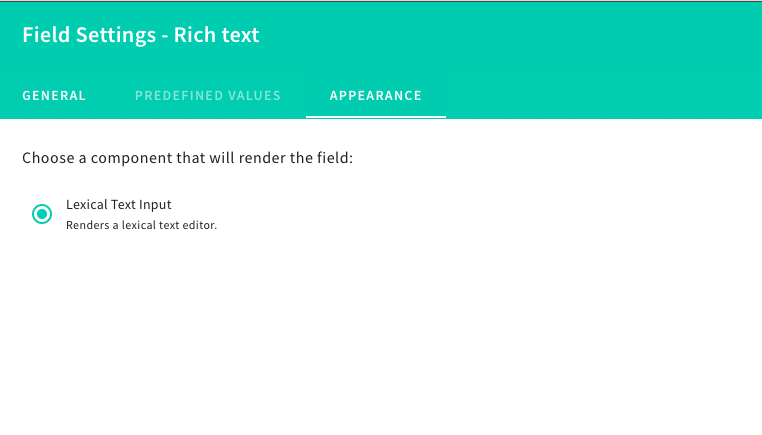
 Lexical editor as default Rich Text field option in Headless CMS